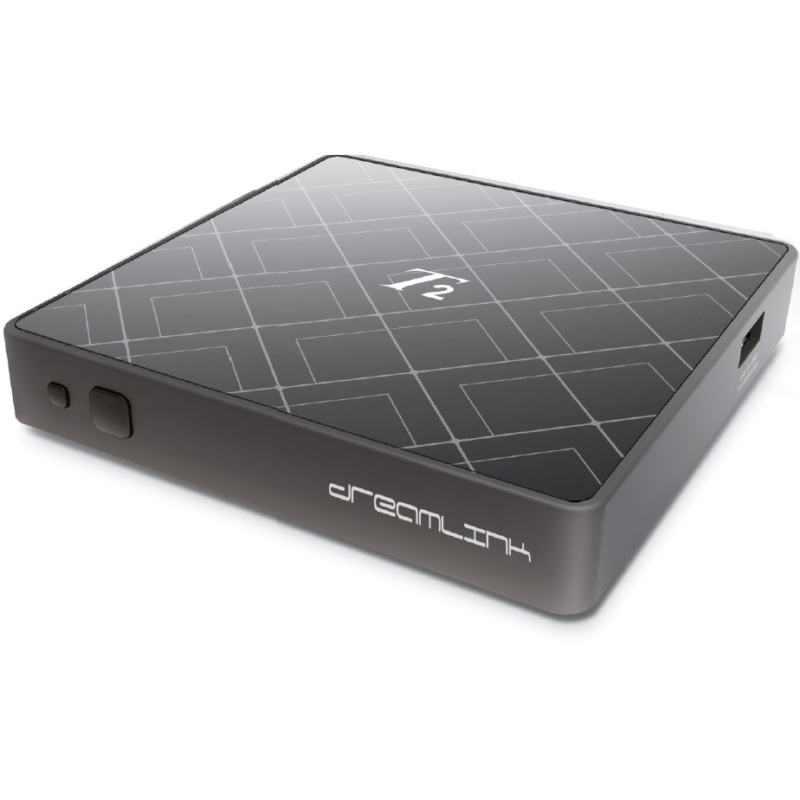
The Dreamlink T1 and T2 are devices that grant access to IPTV channels. They feature an interface grounded on the Stalker Middleware, a framework crafted to metamorphose these cybernetic channels into a tableau from when one may readily designate the desired channel for perusal.
Fundamentally, these commodities facilitate the perusal of the myriad channels on offer, allowing one to cherry-pick the most enthralling among them. Additionally, the user interface encompasses a web navigator, a video playback tool, and an amalgamation of assorted applications. Software prerequisites for IPTV viewing are encompassed within.
How to add IPTV channels to Dreamlink
In order to add channels to your dreamlink device, follow the below steps.
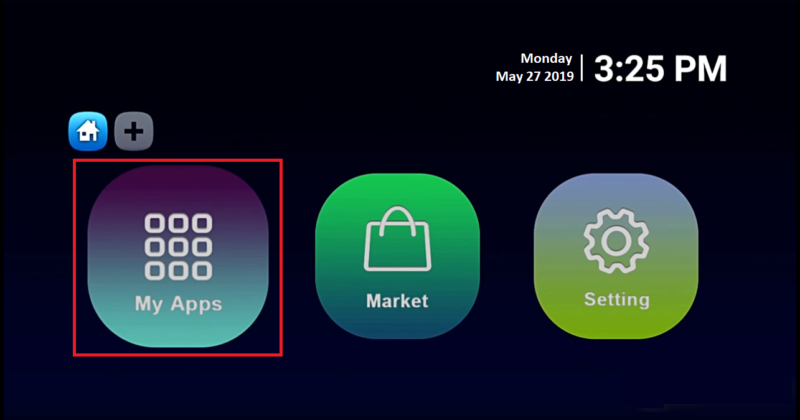
Step 1: From the main page, go to “My Apps“.
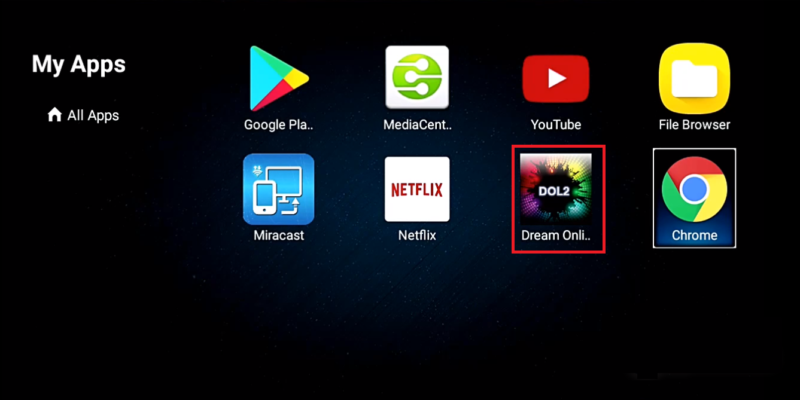
Step 2: Select DreamOnline (DOL 2).
Note: Should the DreamOnline (DOL2) application not be found within the My Apps directory, kindly navigate to the Market folder, locate DreamOnline (DOL2), and initiate its installation. Following this process, it will be accessible within the My Apps folder.
Step 3: Proceed to select “Edit Service” followed by clicking on “Click Edit”
It is imperative to ensure registration on the Server Operator Homepage with the correct MAC Address if required.
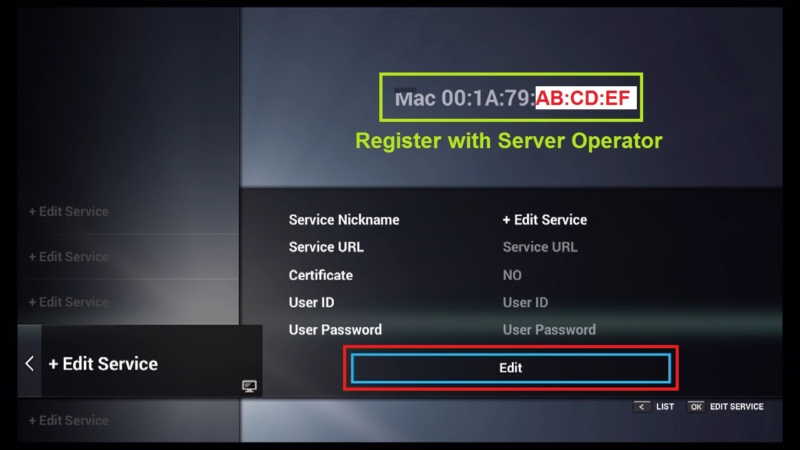
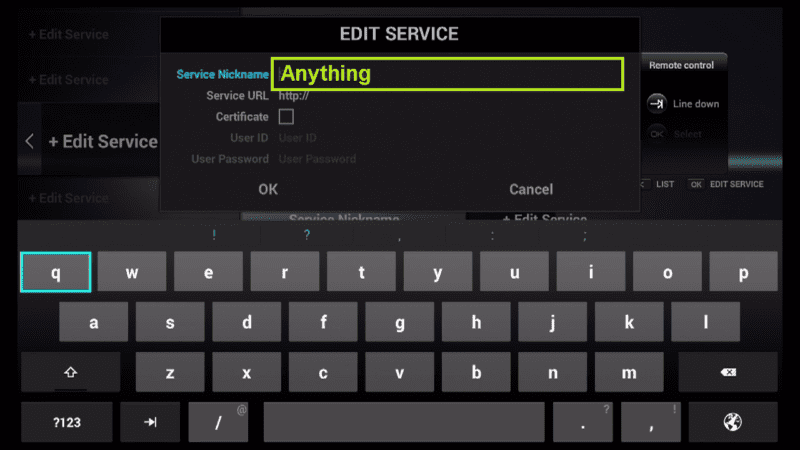
Step 4: Enter the Service Nickname (Any name).
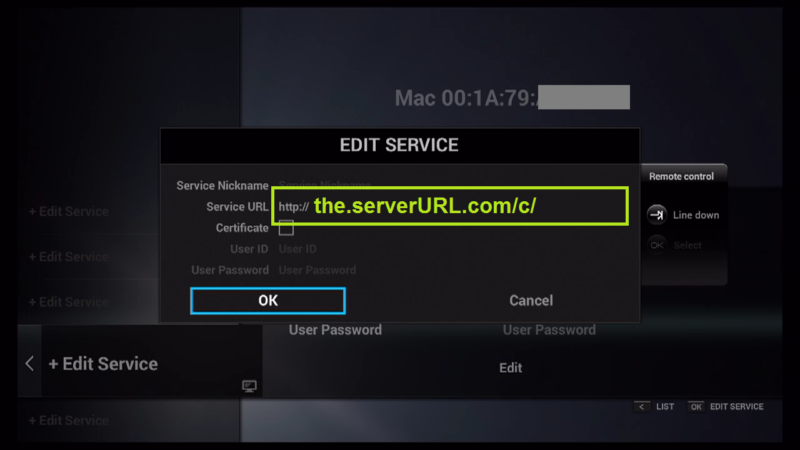
Step 5: Enter the IPTV Server URL (Portal URL) you get from your Server Operator.
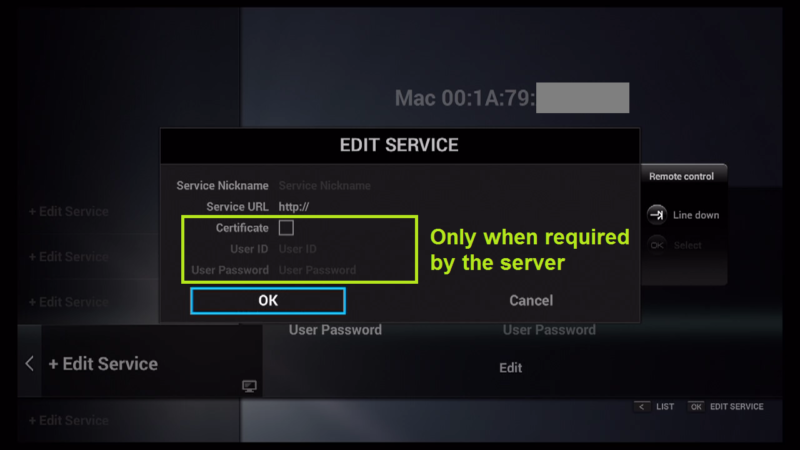
Step 6: It is NOT necessary to enter the Username and Password.
Step 7: Now Click “OK“.
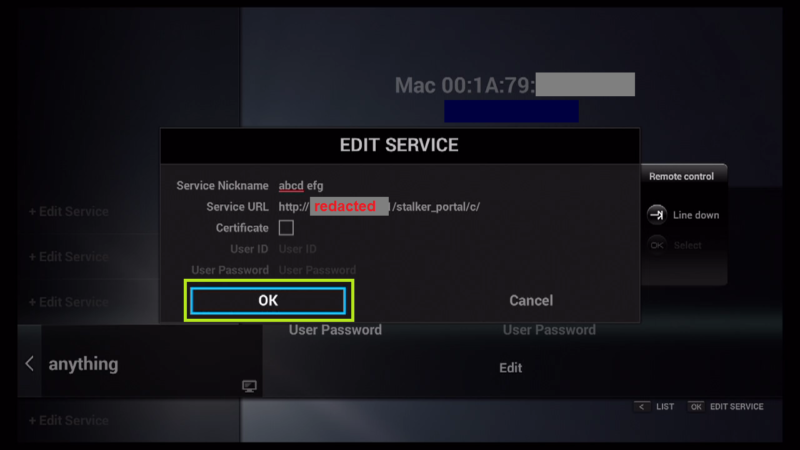
Step 8: Connecting to IPTV Server (with your registered data) in progress.
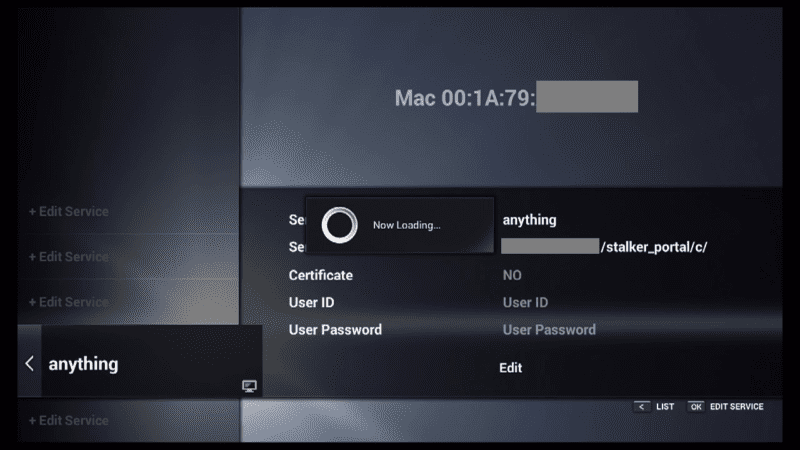
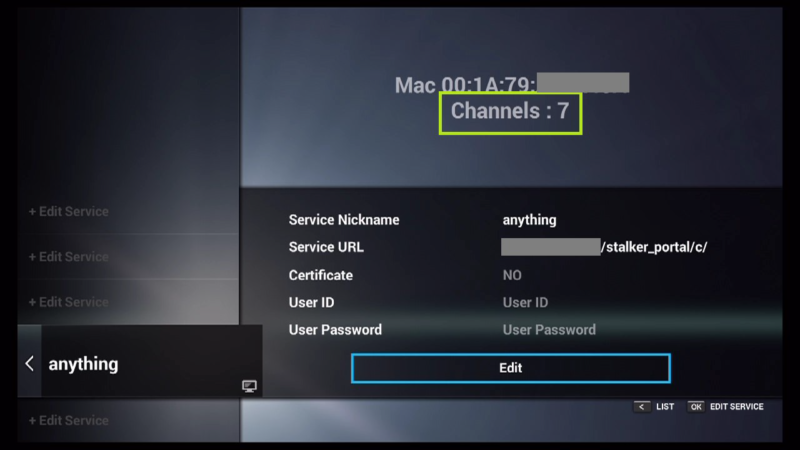
Step 9: Successful Connection! You receive all channels associated with your account.
Feel free to submit any questions or provide feedback regarding this article in the comments section. Your input is highly valued and will assist us in enhancing the quality of our content. Thank you!
